Kubernetes Security Part 1 - Security Contexts
Kubernetes is an open-source container orchestration system that has become a popular choice for managing and deploying containerized applications. However, as with any complex system, security is a critical concern. In this article, we will explore various ways to secure a Kubernetes cluster and the applications running on it, from securing the network and infrastructure to hardening the configuration of individual resources. Whether you are a Kubernetes administrator, devops, devsecops or a developer deploying applications on a cluster, this article will provide in depth information to help you keep your systems secure.
I will first create an application which is intentionally vulnerable, demonstrate how an attacker could exploit such vulnerablity, and use different features on kubernetes to either secure them or reduce the impact of such vulnerablities.
Preparing application
Let us first create a basic flask application, dockerize it and deploy in the kubernetes cluster. Then we will try to secure this application that is running on kubernetes cluster.
You can follow along if you want as this will be a very detailed article on securing k8s workloads and different components on k8s cluster. You can find docker images on my dockerhub repository(shishirsub10/k8s-security-demo). This will be a first part of many articles for securing kubernetes cluters. In this article, we will be discussing and implement security contexts on our deployment.s
Flask Application
from flask import Flask,make_response,json,request
import os
import requests

app = Flask(__name__)

@app.route('/')
def index():
    u = os.getenv('USERNAME')
    p = os.getenv('PASSWORD')
    data = {"username":u, "password": p}

    response = app.response_class(
        response=json.dumps(data),
        status=200,
        mimetype='application/json'
    )
    return response

@app.route('/fetch', methods=["GET","POST"])
def fetch():
    url = request.args.get("url")
    try:
        r = requests.get(url)
        return r.text
    except:
      return 'Please enter a valid url'
- We have a basic application which is made in flask which have two endpoints.
- When
/endpoint is called, it fetchesusernameandpasswordfrom environment variables and just returns the contents of the environment variables as output. - Another endpoint (
/fetch) takes GET Parameterurlfrom the user input and makes a request to that endpoint, fetches the content and just returns the response back. - If you are familiar with Server Side Request Forgery(SSRF), you can see that
/fetchendpoint is vulnerable to SSRF. But this is intentional as we will use security context to limit the impact even if the endpoint is vulnerable to SSRF. If you are not aware about SSRF, do not worry. I will be talking about SSRF in detail on how this can be exploited and prevented with a real attack scenario later on the article.
requirements.txt
Flask
requests
This file contains the packages needed by our code which will be installed while building the docker image.
Dockerfile
FROM python:3.7-alpine

RUN apk update && apk upgrade

COPY . /app
WORKDIR /app

ENV FLASK_DEBUG=1
ENV FLASK_APP=main.py

RUN pip3 install -r requirements.txt

RUN chown -R nobody:nobody /app
RUN chmod 700 -R /app
USER nobody

CMD ["flask","run", "--host=0.0.0.0","--port=8000"]
- Here we have created the Dockerfile which uses python3.7’s alpine image.
- Then the dependencies are installed and finally we run flask server on port 8000.
- Note: Flask is run on development mode in this example which should not be done on production. Please follow the best practices guidelines on how to deploy flask application on production environment.
I have built a docker image and pushed it to dockerhub. You can simply reference the image from the dockerhub while creating the deployment or you can copy all the files that I have provided and build the image yourself.
Building docker image
╭─ubuntu@shishir ~/
╰─$ docker build . -t k8s-security-demo
I have build the docker image, and pushed to docker hub which can be referenced using shishirsub10/k8s-security-demo:test tag.
Kuberenetes Deployment
Now it is the time to deploy our application on kubernetes cluster.
---
apiVersion: v1
data:
  USERNAME: shishirsub10
  PASSWORD: I_SURELY_HAVE_A_VERY_SECURE_PASSWORD
kind: ConfigMap
metadata:
  name: my-credentials
---
apiVersion: apps/v1
kind: Deployment
metadata:
  name: test
  labels:
    app: test
spec:
  selector:
    matchLabels:
      app: test
  template:
    metadata:
      labels:
        app: test
    spec:
      containers:
      - env:
        envFrom:
        - configMapRef:
            name: my-credentials
        image: shishirsub10/k8s-security-demo
        name: test
- We have created a configmap called my-credentials which contains a sample username and password which will be consumed by our
/endpoint. Please note it is never a good idea to create configmaps with sensitive information. - We have created a deployment called
testwhich usesshishirsub10/k8s-security-demo:testas a base image and the variables on the configmap that was created earlier are injected into pod as environment variables. - The other are pretty standard stuffs on the deployment.
Deploying the application
Now that we are all set, let us deploy the application on our kubernetes cluster.
╭─ubuntu@shishir ~/Desktop/demo/k8s
╰─$ kubectl apply -f deploy.yaml
configmap/my-credentials created
deployment.apps/test created
Both configmap and deployment are successfully created.
Checking the logs and applications
Let us validate if the application inside the pod is running as expected.
╭─ubuntu@shishir ~/
╰─$ kubectl get pods
NAME                   READY   STATUS    RESTARTS   AGE
test-d6dbc55cf-2stdb   1/1     Running   0          23s

╭─ubuntu@shishir ~/
╰─$ kubectl logs -f test-d6dbc55cf-2stdb
 * Serving Flask app 'main.py'
 * Debug mode: on
WARNING: This is a development server. Do not use it in a production deployment. Use a production WSGI server instead.
 * Running on all addresses (0.0.0.0)
 * Running on http://127.0.0.1:8000
 * Running on http://10.0.72.120:8000
Press CTRL+C to quit
 * Restarting with stat
 * Debugger is active!
 * Debugger PIN: 734-472-424
The pod is on running state and looking from the logs everything seems to be running as expected.
Port Forwarding
We can use kubectl’s port-forward feature to access the application that is running inside the pod from our local machine.
╭─ubuntu@shishir ~/
╰─$ kubectl port-forward test-d6dbc55cf-2stdb 8000:8000
Forwarding from 127.0.0.1:8000 -> 8000
Forwarding from [::1]:8000 -> 8000
We have opened 8000 port on our local machine and forwarded all the traffic coming to that port to port 8000 inside the container. Now, we can make curl requests to the local server and test the functionality of our application.
Making a request using curl
╭─ubuntu@shishir ~/
╰─$ curl http://localhost:8000
{"password": "I_SURELY_HAVE_A_VERY_SECURE_PASSWORD", "username": "shishirsub10"}
We get the valid output back and everything looks perfect. Now that our application is running as expected, let us start the fun part and secure this workload.
Kubernetes Hardening
We will discuss the following topics in great detail and implement them.
- Adding Security Context to the Deployment
- Scan docker images periodically for vulnerabilities
- Implement Network Policy
- Secrets Management
- Update worker and master nodes periodically
- Use separate service accounts for different deployment
- Implement RBAC
- Monitoring of kubernetes workloads/clusters
- Audit logging
- Enfore default policies
Adding Security Context to the Deployment
Since, there are a lot of topics to cover and if I tried to cover all the topics in this single article, it will be very lengthy. So, we will start with the first topic where we implement security contexts on our deployment. Following are the things that I will cover in this article.
- Running containers as low privileged user
- Discard the use of privileged Containers unless absolutely needed
- Set allowPrivilegeEscalation to false
- Read only root file system
- Limit capabilities that are mounted inside the pod
- Implement apparmor
Running containers as low privileged user
If nothing is specified on the Dockerfile or the deployment manifest, the application running inside the pod will run as high privileged (root) user by default. If an attacker found a vulnerability on which they can execute arbitary code on our application(RCE), they will be able to execute commands inside the pod as root user. So, it is always adviced to run application as low privileged users. In our case, we have already specified USER directive on our dockerfile and the application that is running inside the pod will run as user nobody.
To demonstrate the impact of code vulnerable to command injection, following is a flask application with endpoint /ping which takes a IP address as GET parameter(ip) and tries to ping to that address to check if the host is alive or not.
@app.route('/ping')
def ping():
    ip = request.args.get('ip')
    try:
        output = os.system("ping -c 1 " + ip)
        return "Ping successful"
    except:
        return "Ping failed"
This is an endpoint where we GET parameter is not sanitized. A threat actor can pass 127.0.0.1; rm -rf /* as ip and if the application is running as root user, it will wipe out all the contents of the root filesystem.
Checking whether the application is running as nobody or not?
Since, our application is not running as root, even if the application is vulnerable to command injection, they will not be able to delete all the content of the / filesystem as USER nobody do not have that privilege.
Note: There are other ways that command injection can be used to exploit the system even if the container is running as low privileged user.
Let us validate if the container is running as USER nobody or not.
╭─ubuntu@shishir ~/
╰─$ kubectl exec test-d6dbc55cf-2stdb -- id
uid=65534(nobody) gid=65534(nobody)
And indeed the container is running as nobody. Since this is an alpine image, we are running as user nobody. You might not find this user if you are using image created from other distro. For eg. If the base image is debain based, you might find www-data user which is usually used to run the web servers. If you are confused on which user to use, you can always create a new user which you are building the image using Dockerfile. But make sure you do not provide an extra privilege to the newly created user.
To demonstrate the difference, I have removed the following 3 lines from our Dockerfile.
RUN chown -R nobody:nobody /app
RUN chmod 700 -R /app
USER nobody
Now the updated Dockerfile will be:
FROM python:3.7-alpine

RUN apk update && apk upgrade

COPY . /app
WORKDIR /app

ENV FLASK_DEBUG=1
ENV FLASK_APP=main.py

RUN pip3 install -r requirements.txt

CMD ["flask","run", "--host=0.0.0.0","--port=8000"]
I have built the image and pushed it to dockerhub. Please reference the image on your deployment using shishirsub10/k8s-security-demo:root tag.
Let us update the image on our deployment. You can either edit the deploy.yaml file or run the following inline command.
╭─ubuntu@shishir ~/
╰─$ kubectl set image deployment/test test=shishirsub10k8s-security-demo:root
Now the flask application should be running with the privileges of a root user.
╭─ubuntu@shishir ~/
╰─$ kubectl exec test-76bf98555c-99fxm -- id
uid=0(root) gid=0(root) groups=0(root),1(bin),2(daemon),3(sys),4(adm),6(disk),10(wheel),11(floppy),20(dialout),26(tape),27(video)
We can clearly see the difference on the privileges.
Even if the docker image was created with privileged(root) user, we can use security contexts to run the application inside the pod as low privileged user.
Adding Security Context to our deployment
apiVersion: apps/v1
kind: Deployment
metadata:
  name: test
  labels:
    app: test
spec:
  selector:
    matchLabels:
      app: test
  template:
    metadata:
      labels:
        app: test
    spec:
      containers:
      - env:
        envFrom:
        - configMapRef:
            name: my-credentials
        image: shishirsub10/k8s-security-demo
        name: test
        securityContext:
          runAsUser: 65534
          runAsGroup: 65534
- Here we have added few lines to our deployment.
- runAsUser and runAsGroup are used to sepecify the user/group with which we want our containers to run with
Note: Please make sure that the UID/GID exists inside the container.
Verifying the changes
╭─ubuntu@shishir ~/
╰─$ kubectl exec -ti test-8479c55455-6qvc5 -- /bin/sh
/app $ id
uid=65534(nobody) gid=65534(nobody)
/app $ ps -ef | head -n 2
PID   USER     TIME  COMMAND
  1  nobody    0:00   {flask} /usr/local/bin/python /usr/local/bin/flask run --host=0.0.0.0 --port=8000
Now when we exec inside the pod, we are exec-ing as user nobody and also the flask application is running as nobody.
Note: Please ensure that all the files that the flask application needs to run is accessible by user nobody for this to work as expected. If the files were only readable by root and not by user nobody, this would have broken the application which might create downtime on your production workloads.
Discard the use of privileged Containers unless absolutely needed
When privileged is set to true on security contexts, the container is given extended privileges, including access to all devices on the host. This can be useful for containers that need to be able to perform tasks such as mounting filesystems, but it also carries a high level of risk because the container can potentially compromise the host on which the container is running. Use of the privileged flag should only be limited to those containers that absolutely require it.
Here are few examples that a privileged container can do:
- Ability to mount the host filesystem
- All linux capabilities will be mounted inside the container
- Access to all devices(
/dev) that the host has
Check this writeup which shows on how we can break out from privileged docker containers into host system.
We can prevent this from happening by setting privileged to false on our security contexts.
..................[snip]...........
        securityContext:
          runAsUser: 65534
          runAsGroup: 65534
          privileged: false
Note: By default, the container does not run with elevated privileges as the privileged is not set to true. If you decide to set this flag to true, make sure to restrict the permissions that the container has with other security mechanisms.
Always Set allowPrivilegeEscalation to false
allowPrivilegeEscalation controls whether a process can gain more privileges than its parent process. This bool directly controls whether the no_new_privs flag gets set on the container process.allowPrivilegeEscalation is always true when the container:
- is run as privileged, or
- has CAP_SYS_ADMIN capabilities
Reference: https://kubernetes.io/docs/tasks/configure-pod-container/security-context/
To demonstrate the impact, I will change the Dockerfile to use the debain image. New image can be found on dockerhub with tag shishirsub10/k8s-security-demo:deb
Updated Dockerfile
FROM python:3.7-slim-bullseye

COPY . /app
WORKDIR /app

ENV FLASK_DEBUG=1
ENV FLASK_APP=main.py
RUN pip3 install -r requirements.txt

RUN cp /bin/bash /opt/bash && chmod 4777 /opt/bash

CMD ["flask","run", "--host=0.0.0.0","--port=8000"]
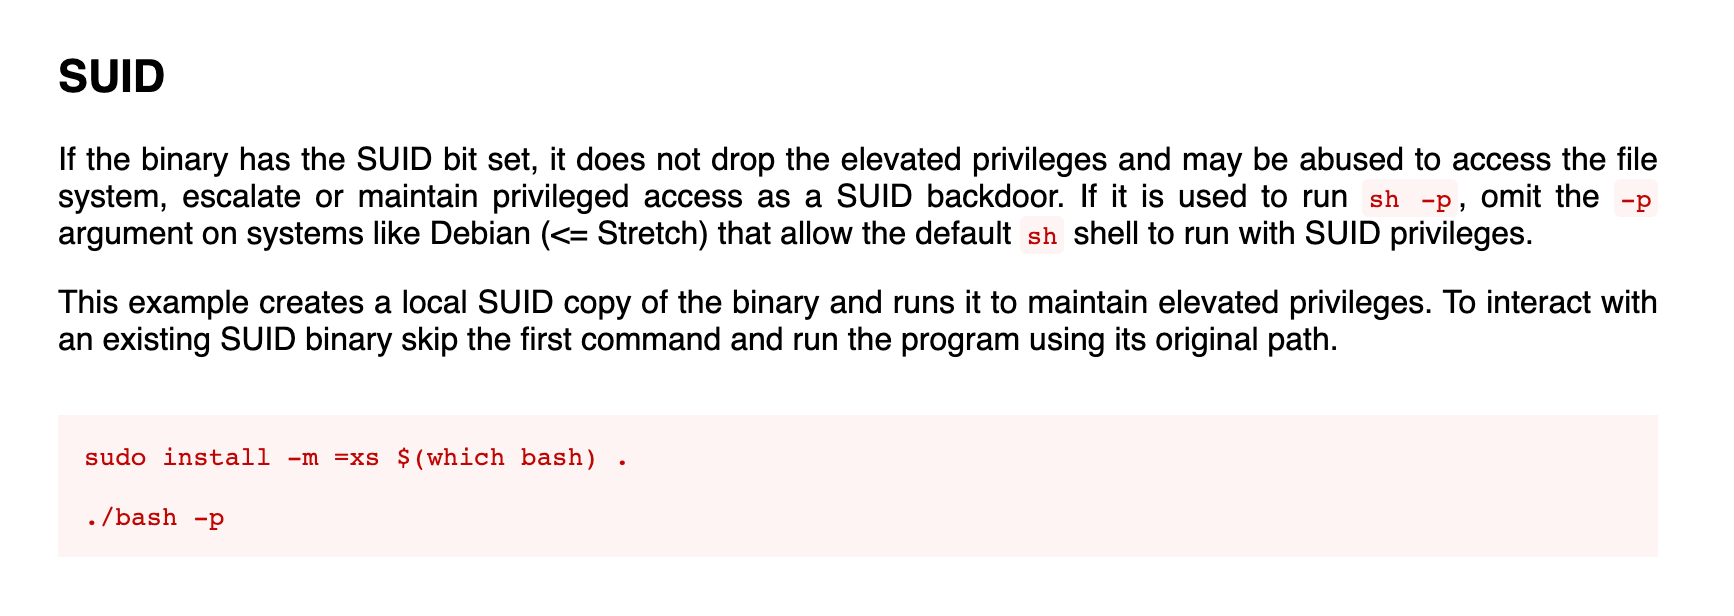
Additional thing that I have done here is copy /bin/bash binary to /opt/bash and have set SUID flag on the binary. Since the SUID bit is set, now if the binary is executed, it will have the effective privileges of the owner of the binary(root) rather than the user who executed it.
By default on linux systems, binaries like ping and passwd have SUID bit set on them. Since ping needs access to raw sockets, it needs elevated privileges which only root users have
passwd binary is used to change the user’s password on linux systems. An user should be able to change their own password but the while changing password, the user should have at least read/write access to /etc/shadow file.
$ ls -la /etc/shadow
-rw-r----- 1 root shadow 1416 Jan 23 09:14 /etc/shadow
If we look at the file permission for /etc/shadow file, we can see that only root user can edit the content and users on the shadow group can read it. It means that a low privileged user should not be able to change their own password as they do not have any access to this file. But that is not the case. That’s where SUID bit comes into play.
$ ls -la /usr/bin/passwd
-rwsr-xr-x 1 root root 59976 Nov 24 12:05 /usr/bin/passwd
If we look at the permissions for the passwd binary, we can see that SUID bit is set and the owner for this binary is root which means when this binary is executed it will run with the effective privilege of the owner of the file(root). So, while creating SUID binaries, we should make sure that they do not contain mallicious code which can be used to escalate privileges.
Check this site which provide guidelines on how to escalate privileges from the diffrent SUID binaries.
Changing the deployment
Now that we know what SUID binaries are, let us change the deployment to use the new debian image that can be found on shishirsub10/k8s-security-demo:deb.
╭─ubuntu@shishir ~/
╰─$ kubectl set image deployment/test test=shishirsub10/k8s-security-demo:deb
deployment.apps/test image updated
Getting a shell inside newly created pod
╭─ubuntu@shishir ~/
╰─$ kubectl get pods
NAME                    READY   STATUS    RESTARTS   AGE
test-65c5c5bffd-qd988   1/1     Running   0          47s
╭─ubuntu@shishir ~/
╰─$ kubectl exec -ti test-65c5c5bffd-qd988 -- /bin/bash
nobody@test-65c5c5bffd-qd988:/app$ id
uid=65534(nobody) gid=65534(nogroup) groups=65534(nogroup)
We can see that we are running as user nobody. Now let us revisit that /opt/bash binary which has SUID bit set.
Escalating privileges to root using SUID binary
Let us check gtfobins if we can exploit the SUID bit that is set on /bin/bash binary and it turns out we can.
Reference: https://gtfobins.github.io/gtfobins/bash/
Let us use this to elevate our privileges.
nobody@test-65c5c5bffd-qd988:/app$ ls -la /opt/bash
-rwsrwxrwx 1 root root 1234376 Jan  5 19:01 /opt/bash
nobody@test-65c5c5bffd-qd988:/app$ /opt/bash -p
bash-5.1# id
uid=65534(nobody) gid=65534(nogroup) euid=0(root) groups=65534(nogroup)
After executing the binary with -p flag which ensures that the newly created binary has root privileges, we can see that we have the EUID=0 which means we have successfully escalated privileges.
An attacker can exploit binary with SUID privileges to gain root privileges even if the pod was running as low privileged users.
There is a vulnerability on old sudo binary itself which can be abused to gain root privileges.
Reference: https://www.logpoint.com/en/blog/sudo-privilege-escalation-vulnerability/
We can prevent all this by setting allowPrivilegeEscalation to false.
Changing the deployment
...............[snip]................
        securityContext:
          runAsUser: 65534
          runAsGroup: 65534
          allowPrivilegeEscalation: false
...............[snip]................
- We need to add
allowPrivilegeEscalationtofalseon our deployment file and apply the changed deployment.
Checking if we can escalate privileges
After the deployment is changed, let us check if we can still escalate the privileges using that /opt/bash binary.
╭─ubuntu@shishir ~/
╰─$ kubectl exec -ti test-7c5c4bf8f6-6vxx8 -- /bin/bash
nobody@test-7c5c4bf8f6-6vxx8:/app$ id
uid=65534(nobody) gid=65534(nogroup) groups=65534(nogroup)

nobody@test-7c5c4bf8f6-6vxx8:/app$ /opt/bash -p
nobody@test-7c5c4bf8f6-6vxx8:/app$ id
uid=65534(nobody) gid=65534(nogroup) groups=65534(nogroup)
It looks like this time we were not able to escalate our privileges to root even if SUID bit is set on that binary.
Read only root file system
Assumung an attacker already has a foothold on your system and is able to get a shell on one of your containers, apart from leaking your sensitive information like source code and credentials, they can also change the code which might alter the logic of your application targeting your customer if possible(might not be possible for python application) or simply run bitcoin miner which will increase resource comsumption of your worker node and might degrade performance of your application.
As a prevention method, if your application does not need to write anything to the filesystem, we can mount the root filesystem as read only. This way, even if the attacker gets a shell on the container, they will not be able to change any files present on the filesystem.
Note: If the root file system is set as read only, /dev/shm is the only place inside the container which is writeable. If noexec permission is set on /dev/shm, an attacker won’t be able to execute binaries from the compromised container.
Let us change our deployment and set the root file system to read only.
................[snip]..................
        securityContext:
          runAsUser: 65534
          runAsGroup: 65534
          privileged: false
          allowPrivilegeEscalation: false
          readOnlyRootFilesystem: true
- Here we have set
readOnlyRootFilesystemtotrueon the security contexts.
Checking if we can write files Let us get a shell inside a container and try to create files.
╭─ubuntu@shishir ~/
╰─$ kubectl exec -ti test-57f89bf95c-f6zk8 -- /bin/bash
nobody@test-57f89bf95c-f6zk8:/app$ touch test
touch: cannot touch 'test': Read-only file system
It seems like we are not able to create a file.
Note: Before changing your root file system to read-only for production grade application, please ensure that your application is not creating/modifiying/deleting files.
If your application need to manipulate the files, create a ephemeral volume and mount it inside the pod which will make that particular directory writeable. I will create a ephemeral volume and mount in /opt/data where I can write files. The data that is present on this volume will be lost if the pod is terminated or restarted.
Changing the deployment
..............[snip].................
        volumeMounts:
        - name: data
          mountPath: /opt/data
        securityContext:
          runAsUser: 65534
          runAsGroup: 65534
          privileged: false
          allowPrivilegeEscalation: false
          readOnlyRootFilesystem: true
      volumes:
      - name: data
        emptyDir: {}
Here we create an empty volume with name data and mount the volume inside the container in /opt/data path.
After changing the deployement, let us validate our changes.
╭─ubuntu@shishir ~/
╰─$ kubectl exec -ti test-64d8c4dbcb-859mr -- /bin/bash
nobody@test-64d8c4dbcb-859mr:/app$ touch test
touch: cannot touch 'test': Read-only file system
nobody@test-64d8c4dbcb-859mr:/app$ touch /opt/data/test.txt
nobody@test-64d8c4dbcb-859mr:/app$ ls -la /opt/data/test.txt
-rw-r--r-- 1 nobody nogroup 0 Jan  5 19:51 /opt/data/test.txt
We are able to create a file on /opt/data/ folder but on on /app folder.
Limiting the capabilities that are mounted inside a pod
Capabilities are the way of giving a process extra privileges to perform certain task that normally the process that was launced by an user does not posses.
For eg: In our case, if we wanted to run the flask server on port 80 and if the flask server is running as user nobody , then that user won’t have permission to serve our application on port 80 as ports less than 1024 are considered privileged on linux system. So, using only capabilities we can acheive this without running the whole application as root.
In this case, we need to add new privileges but also we can limit down the capabilities that are provided by kubernetes by default while creating a pod.
I have created an image which runs flask application on port 80. Find that image on dockerhub with shishirsub10/k8s-security-demo:port80 tag.
Changing and applying the deployment
.......................[snip]................
        image: shishirsub10/k8s-security-demo:port80
        name: test
        imagePullPolicy: Always
        securityContext:
          runAsUser: 33
          runAsGroup: 33
          privileged: false
          allowPrivilegeEscalation: false
          readOnlyRootFilesystem: true
          capabilities:
            drop:
            - ALL
Here we have changed the image to shishirsub10/k8s-security-demo:port80 and dropped all the capabilities for the container by adding capabilities on our security context.
Let us check if the pod has capabilities to run on port 80.
╭─ubuntu@shishir ~/
╰─$ kubectl get pods
NAME                    READY   STATUS    RESTARTS   AGE
test-7457bfc576-cqd7p   1/1     Running   0          74s
Interestingly the pod is on running state which is a little bit unexpected. Let us read the logs of the pod to check if the flask server really was able to bind on port 80.
╭─ubuntu@shishir ~/
╰─$ kubectl logs -f test-7457bfc576-cqd7p
 * Serving Flask app 'main.py'
 * Debug mode: on
WARNING: This is a development server. Do not use it in a production deployment. Use a production WSGI server instead.
 * Running on all addresses (0.0.0.0)
 * Running on http://127.0.0.1:80
 * Running on http://10.0.72.109:80
Press CTRL+C to quit
 * Restarting with stat
 * Debugger is active!
 * Debugger PIN: 586-712-820
To my surprise, the flask server really was able to bind to port 80 and running without any problems. In linux, all the port less than 1024 are considered privileged and you will need root privileges to be able to bind to those port but this is not the case here.
Debugging why this works
/proc/sys/net/ipv4/ip_unprivileged_port_start file contains the value from where the privileged port should start and the default value for the linux systems is 1024. Let us check the content of this file inside the pod.
╭─ubuntu@shishir ~/
╰─$ kubectl exec test-7457bfc576-cqd7p -- cat /proc/sys/net/ipv4/ip_unprivileged_port_start
0
And by default, docker treats all of its ports as unprivileged. That is why flask server was able to run on port 80.
This can be done on docker run using --sysctl net.ipv4.ip_unprivileged_port_start=1024 while running a container.
╭─ubuntu@shishir ~/
╰─$ docker run -ti --cap-drop=all --sysctl net.ipv4.ip_unprivileged_port_start=1024 --rm shishirsub10/k8s-security-demo:port80 bash
WARNING: The requested image's platform (linux/amd64) does not match the detected host platform (linux/arm64/v8) and no specific platform was requested
www-data@d1bafac05b4c:/app$ python3 -m http.server 80
Traceback (most recent call last):
  File "/usr/local/lib/python3.7/runpy.py", line 193, in _run_module_as_main
    "__main__", mod_spec)
  File "/usr/local/lib/python3.7/runpy.py", line 85, in _run_code
    exec(code, run_globals)
  File "/usr/local/lib/python3.7/http/server.py", line 1279, in <module>
    test(HandlerClass=handler_class, port=args.port, bind=args.bind)
  File "/usr/local/lib/python3.7/http/server.py", line 1247, in test
    with ServerClass(server_address, HandlerClass) as httpd:
  File "/usr/local/lib/python3.7/socketserver.py", line 452, in __init__
    self.server_bind()
  File "/usr/local/lib/python3.7/http/server.py", line 138, in server_bind
    socketserver.TCPServer.server_bind(self)
  File "/usr/local/lib/python3.7/socketserver.py", line 466, in server_bind
    self.socket.bind(self.server_address)
PermissionError: [Errno 13] Permission denied

www-data@d1bafac05b4c:/app$ cat /proc/sys/net/ipv4/ip_unprivileged_port_start
1024
Now that we are asking the system to start the privileged port number from 1024 rather than 0 while starting the container and the application do not have the permission to bind to port 80. That is why we are getting the error.
Now, let us get back to capabilities on kubernetes.
There are few default capabilities that are mounted inside the pod by default. Let us try and list the default capabilities that are mounted inside the container. For this we can use capsh binary which is present on the libcap2-bin package.
Installing capsh inside the container
root@test:~# apt install libcap2-bin
Listing the capabilities
root@test:~# capsh --print
Current: = cap_chown,cap_dac_override,cap_fowner,cap_fsetid,cap_kill,cap_setgid,cap_setuid,cap_setpcap,cap_net_bind_service,cap_net_raw,cap_sys_chroot,cap_mknod,cap_audit_write,cap_setfcap+eip
Bounding set =cap_chown,cap_dac_override,cap_fowner,cap_fsetid,cap_kill,cap_setgid,cap_setuid,cap_setpcap,cap_net_bind_service,cap_net_raw,cap_sys_chroot,cap_mknod,cap_audit_write,cap_setfcap
Securebits: 00/0x0/1'b0
 secure-noroot: no (unlocked)
 secure-no-suid-fixup: no (unlocked)
 secure-keep-caps: no (unlocked)
uid=0(root)
gid=0(root)
groups=
We can see two types of capabilities:
- Current: It is the current capabilities that a process currently has and can use.
- Bounding: These are the most privileged capabilities that a process is allowed to have. A process can not raise its current capabilities beyond Bounding set.
While deciding which capabilities to use, it is your job to find out the capabilities that are needed by your application to function properly.
Follow are the few capabilities that are mounted by default inside the containers:
- cap_chown: Gives us ability to change the UID and GID of files inside the docker container
- cap_dac_override: Bypasses the checks and allows root user to read,write, modify and file on the filesystem
- cap_fowner: an user can change the permission of any file, provided that the user can access the directory where the file is present
- cap_fsetid: Does not clear set-user-ID and set-group-ID mode bits when a file is modified, sets the set-group-ID bit for a file whose GID does not match the filesystem or any of the supplementary GIDs of the calling process
- cap_kill: Process running as root can kill other process either running as root or as non-root
- cap_setgid: A process make arbitrary manipulations of process GIDs and supplementary GID list. It can also forge GID when passing socket credentials via UNIX domain sockets or write a group ID mapping in a user namespace Cap_setuid: Process can change their UID to any arbitary value
- Cap_setpcap: a process with this capability can change its current capability set within its bounding set. Meaning a process could drop capabilities or add capabilities if it did not currently have them, but limited by the bounding set capabilities
- Cap_net_bind_service: Gives the process the ability to bind on the privileged port below 1024
- Cap_net_raw: allow use of RAW and PACKET sockets
- Cap_sys_chroot: allows your processes to chroot into a different rootfs
- Cap_mknod: create special files using mknod and this allows your processes to create device nodes
- Cap_audit_write: Write a message to kernel auditing log
- cap_setfcap: Set file capabilities on a file system
Once we know which capabilities are needed, we can make changes to the deployment file as follows.
.......................[snip]................
        name: test
        imagePullPolicy: Always
        securityContext:
          capabilities:
            drop:
            - ALL
            add:
            - CHOWN
            - MKNOD
            - SETGID
            - SETUID
Here we are dropping all the capbilities and adding the ones that are only needed to run the application properly.
Note: Do not try and change capabilities directly on your application that are running on production. Experiment with capabilties first to determine which of them are actually needed and which are not.
Implement apparmor
AppArmor(Application Armor) is a Linux kernel security module which allow us to restrict the capabilities of individual applicaton. Even if the process has a lot of capabilities mounted and running as root, ee can restrict the capabilities of the process with apparmor profiles.
For the demo, I have created a new flask application with two new endpoints /update-profile and /read-profile. The image containing this code can be found on shishirsub10/k8s-security-demo:apparmor.
Code to upload profile picture
@app.route('/update-profile', methods=['POST'])
def update_profile():
    # Get the POST parameters
    username = request.form['username']
    description = request.form['description']

    # Create a directory for the user if it doesn't exist
    if not os.path.exists(username):
        os.makedirs(username)

    # Write the description to a file inside the user's directory
    with open(os.path.join(username, 'profile-description.txt'), 'w') as f:
        f.write(description)

    return 'Profile updated successfully!'
- Here we take username and description as POST parameter.
- We create a directory with POST parameter
usernameif the directory is not present already. - We save the content on the file
profile-description.txtinside the newly created directory.
Note: This code is intentionally vulnerable which do not have any input sanitization.
Code to read the profile picture
@app.route('/read-profile', methods=['GET'])
def read_profile():
    username = request.args.get("username")
    description_file = request.args.get("file")
    # Read the profile description from the file
    with open(os.path.join(username, description_file), 'r') as f:

        print(os.path.join(username, description_file))
        description = f.read()

    return description
- Here we take username and file as an argument.
- We read the content of the file and display to the user
Making changes on the deployment
Find the updated docker image on the dockerhub under tag shishirsub10/k8s-security-demo:apparmor and the let us change the deployment as follows.
apiVersion: apps/v1
kind: Deployment
metadata:
  name: test
  labels:
    app: test
spec:
  selector:
    matchLabels:
      app: test
  template:
    metadata:
      labels:
        app: test
    spec:
      containers:
      - image: shishirsub10/k8s-security-demo:apparmor
        name: test
Let us change our deployment image to use this new image.
╭─ubuntu@shishir ~/
╰─$ kubectl apply -f apparmor.yaml
deployment.apps/test configured
Applying the deployment with apparmor image
╭─ubuntu@shishir ~/
╰─$ kubectl apply -f deploy.yaml
configmap/my-credentials unchanged
deployment.apps/test configured
Accessing the flask server from local machine
Let us hit the endpoints using curl. But first, let us forward the local port 8000 to the pod’s 8000 so that the flask server running inside the pod is accessible from our local machine.
╭─ubuntu@shishir ~/
╰─$ kubectl port-forward test-9d8db8f75-lt5n5 8000:8000
Forwarding from 127.0.0.1:8000 -> 8000
Forwarding from [::1]:8000 -> 8000
Now let us update the profile description.
╭─ubuntu@shishir ~/
╰─$ curl -XPOST http://localhost:8000/update-profile -d 'username=test&description=test'
Profile updated successfully!
Fetch the description that we have obtained
╭─ubuntu@shishir ~/
╰─$ curl http://localhost:8000/read-profile\?file\=profile-description.txt\&username\=test
test
Everything works as expected. An attacker can analyse the HTTP request and can guess that we are reading something from a file and they can try and change these parameters to try and read some files from the system like .htpasswd, .env, ~/.ssh/id_rsa, /etc/shadow, log files and much more.
Let us try to read the contents of /etc/passwd file which is a standard file in linux system which stores information about local users.
Trying to read contents of /etc/passwd
╭─ubuntu@shishir ~/
╰─$ curl http://localhost:8000/read-profile\?file\=/etc/passwd\&username\=test
root:x:0:0:root:/root:/bin/bash
daemon:x:1:1:daemon:/usr/sbin:/usr/sbin/nologin
bin:x:2:2:bin:/bin:/usr/sbin/nologin
sys:x:3:3:sys:/dev:/usr/sbin/nologin
sync:x:4:65534:sync:/bin:/bin/sync
games:x:5:60:games:/usr/games:/usr/sbin/nologin
man:x:6:12:man:/var/cache/man:/usr/sbin/nologin
lp:x:7:7:lp:/var/spool/lpd:/usr/sbin/nologin
mail:x:8:8:mail:/var/mail:/usr/sbin/nologin
news:x:9:9:news:/var/spool/news:/usr/sbin/nologin
uucp:x:10:10:uucp:/var/spool/uucp:/usr/sbin/nologin
proxy:x:13:13:proxy:/bin:/usr/sbin/nologin
www-data:x:33:33:www-data:/var/www:/usr/sbin/nologin
backup:x:34:34:backup:/var/backups:/usr/sbin/nologin
list:x:38:38:Mailing List Manager:/var/list:/usr/sbin/nologin
irc:x:39:39:ircd:/run/ircd:/usr/sbin/nologin
gnats:x:41:41:Gnats Bug-Reporting System (admin):/var/lib/gnats:/usr/sbin/nologin
nobody:x:65534:65534:nobody:/nonexistent:/usr/sbin/nologin
_apt:x:100:65534::/nonexistent:/usr/sbin/nologin
Since there are no validation on what the value of the GET parameter file can be, we are able to get the output of the any arbitary file on the file system provided that the process running the flask application has permission to read that file.
There are many ways this could have been avoided. But the purpose of this example is to demonstrate on how we can use apparmor to prevent this from happening.
Creating an apparmor profile
First, we have to create an apparmor profile for the application that we want to run and define all the capabilities as well as access that it might need to run as expected. Then we have to import that profile into the worker nodes where where our pod will be scheduled. If you do not know where your pod will be schedule, you need to import the apparmor profile on all of your nodes. For eg. if you have 3 worker nodes running, you have to import that apparmor profile on all the worker nodes. If you wish to create an apparmor profile for a single worker node, you have to use techinques like toleration, affinity so that the desired pod is always scheduled on that particular node.
Disclaimer: I do not possess in depth knowledge about creating apparmor profiles. So, please do not use this apparmor profile for production application.
Loading apparmor profiles
sudo apparmor_parser -q <<EOF
#include <tunables/global>

profile flask-apparmor-profile flags=(attach_disconnected) {
  #include <abstractions/base>
  capability sys_ptrace,
  network inet,
  network inet6,
  signal (receive),
  /** rwmix,
  deny /etc/passwd r,
}
EOF
With this profile, the application will be able to:
- capability sys_ptrace: use sys_ptrace cabailities
- network inet: access to internet via ipv4
- network inet6: access to internet via ipv6
- signal(receive): recieve signal from system which are used for inter process communication
- /** rwmix: Read write access on whole filesystem
-
deny /etc/passwd r: Denying read access to
/etc/passwdfile With this apparmor profile, now our application should not be able to read the content of/etc/passwdfile.
Importing the profile on worker node
For the sake of simplicity, I will be importing this profile on one of the worker node and will use affinity rules to schedule the pod on that particular node.
root@worker1:~# sudo apparmor_parser -q <<EOF
> #include <tunables/global>
>
> profile flask-apparmor-profile flags=(attach_disconnected) {
>   #include <abstractions/base>
>   capability sys_ptrace,
>   network inet,
>   network inet6,
>   signal (receive),
>   /** rwmix,
>   deny /etc/passwd r,
> }
> EOF
Now that we have loaded the profile called flask-apparmor-profile in our worker1 node, let us change our deployment so that this profile is loaded into the container.
Changing our deployment
apiVersion: apps/v1
kind: Deployment
metadata:
  name: test
  namespace: test
  labels:
    app: test
spec:
  selector:
    matchLabels:
      app: test
  template:
    metadata:
      annotations:
          container.apparmor.security.beta.kubernetes.io/test-container-name : localhost/flask-apparmor-profile
      labels:
        app: test
    spec:
      tolerations:
      - key: "apparmor"
        operator: Equal
        value: enabled
        effect: "NoSchedule"
      affinity:
        nodeAffinity:
          requiredDuringSchedulingIgnoredDuringExecution:
            nodeSelectorTerms:
            - matchExpressions:
              - key: apparmor
                operator: In
                values:
                - enabled
      containers:
      - image: shishirsub10/k8s-security-demo:apparmor
        name: test
- I have used both taints and tolerations to make sure that the pod is scheduled on the worker1 node where I have imported an apparmor profile.
- We have added an extra annotation which loads the apparmor profile on the container name test-container-name.
Annotation added
container.apparmor.security.beta.kubernetes.io/test-container-name : localhost/flask-apparmor-profile
Format: container.apparmor.security.beta.kubernetes.io/<container-name> : localhost/<apparmor-profile-name>
While I was testing this out in the beginning, I got confused container name with pod name. So, I thought it would be impossible to load apparmor profile in a deployment as pod name are almost unpredictable. But after some time, I realised that we have to provide the name of the container but not the pod ie. in our case, our container has name test-container-name.
Reference: https://kubernetes.io/docs/tutorials/security/apparmor/
Applying the deployment
╭─ubuntu@shishir ~/
╰─$ kubectl apply -f apparmor.yaml
deployment.apps/test configured
Checking if the pod is on running state
╭─ubuntu@shishir ~/
╰─$ kubectl get pods
NAME                    READY   STATUS    RESTARTS   AGE
test-695ff7864d-ptczg   1/1     Running   0          31s
The pod is on running state.
Checking if the apparmor profile is loaded inside the container
╭─ubuntu@shishir ~/
╰─$ kubectl exec -ti test-695ff7864d-ptczg -- cat /proc/1/attr/current
flask-apparmor-profile (enforce)
Our apparmor profile is loaded and is on enforced mode.
Let us forward the port and check if /etc/passwd file can be downloaded using curl command.
Port-forwarding using kubectl
╭─ubuntu@shishir ~/
╰─$ kubectl port-forward test-695ff7864d-ptczg 8000:8000
Forwarding from 127.0.0.1:8000 -> 8000
Forwarding from [::1]:8000 -> 8000
Trying to download the content of /etc/passwd
╭─ubuntu@shishir ~/
╰─$ curl http://localhost:8000/read-profile\?file\=/etc/passwd\&username\=test
<!doctype html>
<html lang=en>
<head>
<title>PermissionError: [Errno 13] Permission denied: '/etc/passwd'
// Werkzeug Debugger</title>
<link rel="stylesheet" href="?__debugger__=yes&cmd=resource&f=style.css">
<link rel="shortcut icon"
----------------SNIPPED---------------------
with open(os.path.join(username, description_file), 'r') as f:
PermissionError: [Errno 13] Permission denied: '/etc/passwd'
-->
We get a detailed error message as the flask server since it is running on debug mode and this time we are not able to fetch the content of /etc/passwd file. We are getting permission denied error which means that our apparmor profile worked.
Trying to read the content of /etc/hostname
╭─ubuntu@shishir ~/
╰─$ curl http://localhost:8000/read-profile\?file\=/etc/hostname\&username\=test
test-695ff7864d-ptczg
We are able to read the contents of /etc/hostname. It is because there was only a single deny rule on our apparmor profile restricting the access to /etc/passwd file.
Please be very careful while using apparmor profile on enforced mode on the containers running in production. Generate the apparmor profiles very carefully before enforcing the profiles.